How to Resolve QuickBooks Error 15242?

QuickBooks-Error-15242v

Countless entrepreneurs across the planet discover QuickBooks instrumental in dealing with their accounting and bookkeeping undertakings. However its inventive programming is ensured by productive specialists – it isn’t liberated from specialized errors and QuickBooks errors. Among the premier incessant errors that clients experience is QuickBooks Error 15242. This error happens once you utilize the bookkeeping programming or endeavor to update it. The error message might reveal to you that you just aren’t permitted to place in and download finance updates. 

At any opportunity to update QuickBooks or finance administration, you’ll see one among the ensuing error message on your work area screen: 

Intuit consistently delivers updates for every one of its items and that we suggest clients download each update as they make programming more useful. 

As a result of the error, QuickBooks FCS for example the file duplicate assistance doesn’t react as expected. Additionally, the error can impede the right working of the QuickBooks and finance programming. This makes it significant for the client to determine the error since it can end the progression of work which will influence the business. 

Reasons for this error 

  • Wrongly installed QuickBooks programming 
  • In the event, the Intuit QuickBooks file duplicate help gets harmed by one way or another 
  • The client can experience this error if the QuickBooks FCS administration has been debilitated 
  • Another factor causing the trouble is regularly if the QuickBooks finance membership finished 
  • Or then again, in case there’s any very harm inside the company file 
  • In the event the client can’t sign in as administrator, then, at that point, this sort of error may be seen 
  • The client may confront this error if the update cycle is finished ineffectively. Or on the other hand, if the QuickBooks FCS is broken or not reacting 
  • Fruitless update of the finance additionally can end up inside the error 
  • This error for the most part finishes in QuickBooks FCS. It’s not reacting to record copy administration and it’d likewise block the finance and QuickBooks framework. This error at last influences the business 

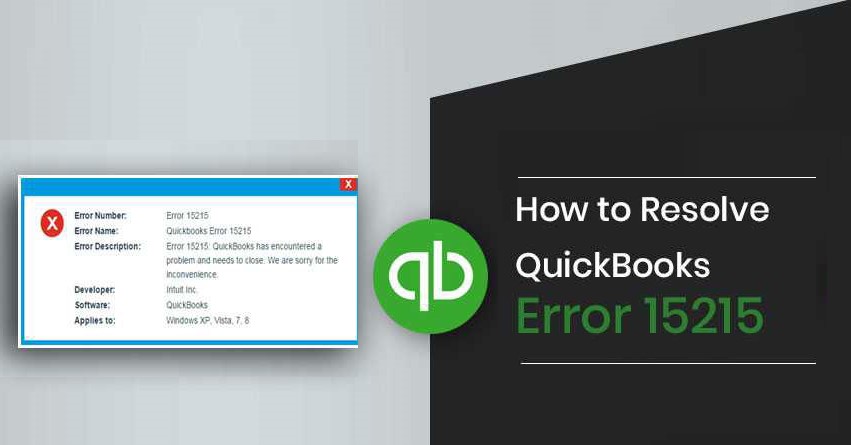
Related: Another QuickBooks Update Error 15215 Same as QuickBooks Error 15242

How to Fix QuickBooks Error 15242 When Attempting to Update the Payroll? 

To investigate QuickBooks finance error 15242, check out the ensuing investigating techniques in the arrangement. 

Solution 1: Validate your Payroll enrollment

  • Open QuickBooks and go to Employees 
  • Select My Payroll Service followed by Account/Billing Information 
  • The QuickBooks Payroll Account Maintenance window will manifest on your work area screen 
  • Close the window and consequently, the money participation will itself be re-approved by QuickBooks 
  • After the endorsement cycle is finished, restart your QuickBooks 

Solution 2: Do a perfect establishment of QuickBooks in Selective Startup 

Maybe an outsider application line against infection is discouraging the establishment interaction of QuickBooks Desktop. It’s important to place in QuickBooks Desktop during a specific startup as this mode would permit you to begin the Windows OS with just chosen programs on your framework. 

  • Open Run order (Windows key +R) and sort MSConfig inside the container to look and hit the OK button 
  • Tap on the general tab and snap-on OK 
  • Snap Selective startup then, at that point, Load framework administration 
  • Go to the help tab, click Hide all Microsoft Services then, at that point, Disable all 
  • Presently, uncheck the checkbox for Hiding all MS Services 
  • Confirm that the Windows Installer checkbox has been picked 
  • Press OK if the checkbox isn’t chosen 
  • Go to the System Configuration window and snap-on Restart 
  • After your framework has duplicated, reinstall QuickBooks Desktop through a clean introduce 
  • Steps to restart your PC to a customary design 
  • Open Run order (Windows key +R) and sort MSConfig inside the case to look and hit OK 
  • Go to the general tab and pick Normal Startup then, at that point, press the OK button 
  • Snap-on Restart on the System Configuration window 

Solution 3: Check in case you’re feeling the loss of any new update 

  • Initially, Open your QuickBooks Desktop. 
  • Then, at that point, press F2 or Ctrl+1 keys on your console to open the Product Information window. 
  • Here you’ll check your present form and the delivery date of the QuickBooks work area. 

If your QuickBooks rendition isn’t the most recent, follow the offered steps to ask the freshest QuickBooks work area updates: 

  • Go to the help menu and pick the Update QuickBooks Desktop alternative. 
  • Then, at that point, move your cursor to the Update Now tab. 
  • Presently decide to Get Updates decision to start the download part. 
  • Once the download cycle gets total, you might want to reboot your QuickBooks. 
  • At last, acknowledge the on-screen directions to place in the new delivery once the screen pops-discharge. 

Solution 4: Perform FCS settings 

  • The exceptionally drive during this cycle is to find the QuickBooks work area oversee the choice
  • Then, at that point, pick the administrations and applications alternative then, click on the administrations showing up on the appropriate side of the screen
  • Once through with that, the client should detect the assistance named “Intuit QuickBooks FCS” then, at that point, double-tap the same
  • The ensuing advance is to tap on the Intuit QuickBooks FCS properties board that presentations on the screen
  • Then, at that point, hit Ok
  • Presently, open the QuickBooks work area then, at that point, download the current updates of the product
  • Followed by, refreshing the assessment tables
  • To complete the strategy, confirm the error continues or not

Solution 5: Manually settle the matter 

Check if the error is going on just on your PC or every one of the frameworks. On the off chance that only one PC experiences issues, download the update on another PC.

QuickBooks Desktop 2018 Download for Windows

Install-and-Setup-QuickBooks-2018

Once you download QuickBooks 2018 Desktop, follow these steps to install QuickBooks desktop. These are similar steps regardless of how many times you require to install it

How to Install QuickBooks 2018?

If you get a problem while you install, we’re here to assist. Here’s the method to fix QuickBooks Desktop install mistakes.

Step 1: Ready for the install

  • Make sure your computer meets the system requirements.
  • If you haven’t ready, download your version of QuickBooks. Save the file somewhere you’ll easily find it (like your Windows desktop).
  • Have your product and registration number handy.

Need help finding product and license number?

  • If you purchased QuickBooks from our website, you’ll find this info within the original purchase email.
  • When you purchased it from a mercantile establishment, search for the label within the original package.
  • If you’re reinstalling, you’ll find this info from your Customer Account Management Portal.
  • If you lost your license or product number, we will assist you to recover them.

Step 2: Install QuickBooks Desktop

  • Open the file QuickBooks.exe.
  • Follow the onscreen instructions. Accept the software license agreement then select Next.
  • Enter your Product and License numbers. Then select Next.
  • Decide which install type is correct for you
  • You have two options once you install QuickBooks, you’ll do the express install, or custom and network.

Express install

  • We recommend an express if you’re:
  • A first-time user
  • Reinstalling QuickBooks.
  • Going to use QuickBooks on one computer (not as a part of a network of computers).
  • Select Express then Next.
  • Select Install.
  • When it finishes, select Open QuickBooks.

Custom and Network install

  • We recommend a custom install if you’re:
  • Installing QuickBooks somewhere aside from the default location (such as on a server).
  • Hosting your company files on a server.
  • Setting up a multi-user network.
  • Select Custom and Network Options then Next.
  • Select the choice that describes how you’ll use QuickBooks.
  • On the subsequent screen, select Change the install location.
  • Select Browse to determine where to place your QuickBooks folder. most of the people put it in their Programs folder.
  • Select Next to begin the install.
  • When it finishes, select Open QuickBooks.

Step 3: Activate QuickBooks Desktop

After you put in it, QuickBooks will ask you to activate and update it. If you would like help, here’s the way to activate QuickBooks Desktop.

  • Activate QuickBooks Desktop for Windows

Learn how to activate or register QuickBooks Desktop after you put in it.

After you put in QuickBooks, you must activate it before you begin. QuickBooks will prompt you to activate, but you’ll also activate it manually with these steps.

To activate QuickBooks:

  • Open QuickBooks.
  • From the assistance menu, select Activate QuickBooks Desktop.
  • Follow the actions on the screen to confirm your info.

Intuit has announced the new and updated features for QuickBooks Desktop 2018 software. All the updated features are available on QuickBooks Pro, Premier, Accountant 2018, and Enterprise 18.0.

The new features are as follows:

  • Multi-monitor support: – Users can assign 3 connected monitors to look at multiple pages.
  • Payroll liability payment reminder: – This feature is offered to people who have an Enhanced Payroll subscription. When payroll liability payments are within 7 days of their scheduled payment due date, the home page will reveal a red label on the Pay Liabilities symbol.
  • Past due stamp on invoices: – Users have the choice to print “past due” on invoices, but also can turn this feature off. Users also can prefer to print the overdue notice on either emailed or printed invoice or customize it invoice to invoice.
  • Merge vendor records: – This feature provides a consolidated window to spot and merge duplicate vendor records. Users can search and sort for both active and/or inactive vendors to merge duplicate records. Up to four individual vendor records are often selected, one designated because of the master record, then merged. Users can as an alternative update vendor record fields on the master record before fusion.
  • Copy and paste keyboard shortcuts: – Users can now copy and paste entire transaction rows with the shortcuts Ctrl+Alt+Y and Ctrl+Alt+V. This feature runs for invoices, estimates, sales receipts, sales orders, credit memos, purchase orders, and timesheets.
  • Cash/accrual toggle on reports: – Users can toggle displayed reports between cash or accounting. consistent with an Intuit blog post, this feature has been in high demand from customers.

Updated features include:

  • Search chart of accounts: – there’s a new search box on the chart of accounts window which will be wont to find and choose a chart of account or sub-account by typing an account number, account name, or incomplete words of an account name. Previously, users had to scroll through the list to search out what they were searching for.
  • Email security: – Users can edit email preferences now to use “enhanced security,” which can enable security for emails sent from Gmail, Outlook, Hotmail, MSN, and Windows Live accounts through QuickBooks.
  • Mobile inventory scanning: – Company users can select numbers at a warehouse using a barcode device or Android mobile to record inventory.
  • Sales order fulfillment workflow: – Users now have access to picklist details on a mobile device that’s connected wirelessly to a QuickBooks Enterprise (QBE) file with Advanced Inventory, and real-time access to the status of sales order fulfillment in QBE. They even have the choice to print the picklists and update the picked quantity manually in QuickBooks.
  • Inventory report customization: – This feature now provides customizable display options added to the subsequent inventory reports: inventory valuation summary or detail, inventory stock status by item, and assembly shortage by item.

If you continue to have issues, we recommend you reach out to an IT professional. These errors mean there is also a general issue with Windows.

Fix QuickBooks Component Repair Tool Downloading Error

quickbooks-component-repair-tool-fixing-error

During QuickBooks installation, sometimes you’ll occur different errors, like Error 1603, 1935, 1904, 1402, etc. These errors are also very tricky and may leave you with your nasty QuickBooks experience at the very initial stage. But, Intuit provides many DIY tips and free tools which you may resolve different QuickBooks errors.

QuickBooks component repair tool is essentially wont to fix the following errors:

  • Installation errors
  • Microsoft components related bugs
  • Microsoft .Net
  • Framework
  • Microsoft MSXML
  • Microsoft Visual C++
  • Error code 1603
  • Error code 1935
  • And many other error codes may be fixed with this tool

How to Download QuickBooks Component Repair Tool

To automatically scan and fix QB components, first, you must Download the QuickBooks Component Tools. But the positive thing is that this tool doesn’t require any specific system configuration or requirement.

To download QuickBooks Component Tools, you require to follow these steps:

  • Stop all the open applications and reboot your pc.
  • Download QuickBooks Component Repair Tool.
  • To perform the program, double-click on the newly-downloaded file. Reboot or restart your pc after running the tool.
  • By following above listed steps you may easily download the QuickBooks Component Tool.

How to Use the QuickBooks Component Repair Tool?

  • At very first, you must restart your computer before operating the QuickBooks component repair tool.
  • And later, quit all the running programs.
  • Next, you have required to download the QB Component Repair Tool from the Intuit website then double-clicking on the downloaded file to run and install the application.
  • At last, you require to reboot your system once the tool installed

How to Fix Installation Errors with QuickBooks Component Repair Tool

Here below are the solution steps.

Solution 1: QuickBooks Installation Diagnostic Tool

  • Download QuickBooks Installation Diagnostic Tool.
  • After the download is completed, notified save the file to a local desktop.
  • Close all the performing applications and perform QuickBooks Installation Diagnostic tool.
  • Now, restart your system after running the tool.

Solution 2: Manually Fix Errors with Microsoft Components

If QuickBooks Installation Diagnostic Tool doesn’t resolve errors stopping QuickBooks installation then, you may go for these two options:

  • Repair Microsoft.NET Framework and MSXML
  • But, it’s advisable to attempt these manual tasks under the guidance of an IT expert or advanced Windows professionals.

Option 1: Repair Microsoft.NET Framework

  • Microsoft.NET Framework is a Microsoft component. it’s used by QuickBooks to add with web applications.
  • You may occur many errors, like QuickBooks Error 1603, Error 1722, Error 1903, and Error 1904 because of issues in Microsoft.NET Framework.
  • To Repair Damaged Microsoft.NET Framework you require To Follow These Steps:
  • First, Download QuickBooks Repair Component Tool
  • When inspired to, save a file on your local desktop
  • Shut down all working applications and double click on QBInstall_Tool_v2.exe
  • After the diagnosis process is completed, you require to restart your computer.
  • After the completion of repair Microsoft.NET Framework, if you continue to occur errors then:
  • Now, Press the Windows key on your keyboard.
  • In the search bar, type Windows Update.
  • Check for Updates.

Option 2: Manually Repair Microsoft MSXML

  • QuickBooks might not perform because of a damaged Microsoft MSXML component. To repair a damaged MSXML component, you’ve got to follow these steps:
  • Register MSXML DLL files
  • Uninstall and reinstall MSXML 6.0
  • Download and install MSXML 6.0 SP1
  • Repair MSXML 6.0

QuickBooks is one of the foremost elegant accounting software. But because of some technical defects within the Windows component or any QuickBooks technical error, any time, it can leave you with a nasty experience. QuickBooks Component Repair Tool fixing error inspection and repair of various Window components utilized in QuickBooks installation. But, to get an optimal QuickBooks installation it’s advisable to install QuickBooks under the guidance of an IT and QuickBooks expert.

How to mark billable expenses when working with QuickBooks?

billable-expenses

Here you will know all about QuickBooks Billable Expense.

Whatever your job, it’s common practice to get things on behalf of others then pass those costs on later in an invoice, with or without mark up. QuickBooks involves a well-integrated way for creating this process that takes no time at all and for Assured that you just don’t ignore to invoice your clients for anything they must be giving for.

Billable Expenses: About

Whether you enter your expense into QuickBooks as a bill, check, or expense, you may mark it as billable. It means that you’ll both enter the customer’s name that the expense has been paid for and check the billable box. If you would like to mark up the price, you’ll enter the applicable percentage. Once you store your transaction the expense gets recorded forever, and a non-posting transaction is additionally recorded called a QuickBooks billable expense.

Create Billable Expense

Above may be a sample expense screen for some lights bought from Dan’s Lighting that was for a project you were preparing for Diego Rodriquez. If you don’t view the billable, client, and mark-up fields on your desktop. You’ll need to activate them first or upgrade to the next level of QuickBooks Online.

Step 1

To activate these options, click the Gear icon within the upper right of QBO, then Account and Settings. Under the Expenses, the tab verifies the latter two features have turned on: track expenses and items by customer and make expenses and items billable. Also, tick the box for “mark up with a default rate of X%.” You’ll leave the default percent as 0.

Step 2

Then within the invoicing module of QuickBooks as you move to generate an invoice for Diego Rodriguez you’ll be reminded about your unbilled, billable expenses. Counting on the version of QuickBooks that you simply are using the reminder could be in the kind of a pop-up or the expenses might just swank to the correct side during a “drawer,” but either way. QuickBooks is keeping track of the expenses you marked billable but have yet to bill from outside clients.

Step 3

All you’ve got to try and do is add the billable expense to your invoice. Whatever information you wrote on the expense will show on the invoice. If you’ve got a mark-up, which will show as a separate item, but not when sent to the customer or printed. The opposite nice feature of billable expenses is that these things can post to a special income account called Billable Expense Income on the P&L, making your reporting more informative.

Create Reoccurring Expenses

In the case of the IT Professional or anyone who sells a similar thing at a similar price to their client, there’s even a faster way to do that.

Set up an item or product/service for the expense. Then anytime you get a similar item you’ll just type the name of the item and everyone associated information will pre-populate. If the buy reoccurs on a similar day every month, you’ll even save it as a reoccurring or memorized transaction, so it automatically posts. The memorized transaction will hold all the mandatory information. Including expense account, amount, description, mark-up percentage, transaction amount, and the client responsible for the charge.

Reporting Billable Expense

The option underneath the red box up the above screenshot says, Track billable expense and items as income. If this box hasn’t ticked, creating a billable expense will create a positive entry to the chosen expense account. Also as a corresponding negative expense within the same account, wiping the expense from your books. Your P&L Detail report would seem like this. If this was the sole transaction on your P&L your income would be $0.

As you’ll see this places an invoice/income transaction type into an expense account. We feel this method portrays inaccurate financial statements. To repair this problem, we recommend you tick the box in Account and Settings > Expenses to inform QuickBooks to “track the expenses and items as income” instead.

Track Billable Bills and Expense as Income

Once this box has been ticked your financial statement will show both an income amount and an expense amount. This also works if using a Cost of products Sold type account. With this extra setting enabled your P&L will.

If you want help customizing billable expenses in QuickBooks to work for your business. Please communicate out to our accounting and bookkeeping team. We’ve experience customizing this and other QuickBooks features to several different industries.

Fix QuickBooks Update Error Code 15215

QuickBooks Error 15215

When you try and download a payroll update, QuickBooks Error 15215 is sometimes caused by a conflict with another application running within the background. the appliance is a program that needs an excessive amount of bandwidth to stop QuickBooks desktop payroll from making connections to the server. It can even be caused by a firewall or firewall setting that will prevent QuickBooks Desktop payroll from connecting to the update server.

Symptoms of QuickBooks Error 15215

  • Error 15215 appears and crashes the application window.
  • Your desktop frequently corrupts with Error 15215 when running an equivalent program.
  • QuickBooks error 15215 is displayed.
  • Windows replies slowly and moves sluggishly to keyboard or mouse input.
  • Your desktop periodically “freezes” for a couple of seconds at a time.

Causes of QuickBooks Update Error 15215

  • Imperfect installation or corrupt download of QuickBooks software.
  • Malware or Virus or infection that has damaged Windows system files or QB payroll program files.
  • Another program maliciously or wrongly deleted QuickBooks payroll-related files.

Solutions to repair QuickBooks Update Error 15215?

You can resolve the QuickBooks update Error 15215 by yourself by following the methods given below:

Solution 1: Reboot the Desktop

First, restart your desktop. This process can force the application that stops QuickBooks Desktop Payroll to shut or reset its settings to help a blocked connection.

Now after restarting, if your problem is solved but still you get error 15215 regularly, check your desktop if there’s any program running on the desktop because it can even be a reason for this. Now understand the actions given below to fix it permanently:

Solution 2: Run QuickBooks Desktop like Windows Administrator.

  • Running QuickBooks as the windows administrator permits QuickBooks to need priority over most other applications in Windows.
  • This also describes Windows to permit QuickBooks Desktop to use any sources necessary to understand properly.
  • Firstly, confirm the QuickBooks Desktop program is closed.
  • On your desktop, right-click on the Desktop icon.
  • Select “Run as administrator”
  • If prompted with the message “Do you would like to permit this program to create changes to your computer?”, select “Yes”

Solution 3: Verify Use TLS 1.0 Is Checked and Use TLS 1.1 And Use TLS 1.2 Are Unchecked within the Internet Options Window Of Internet Explorer.

  • Close QuickBooks application.
  • Open Internet Explorer.
  • Click Tools > Internet Options.
  • Click the Advanced tab.
  • After that, click on Advanced Settings then search options Use TLS 1.0, Use TLS 1.1, and Use TLS 1.2 options.
  • Note: you’ll not find these options in your Internet Explorer version.
  • After that, verify Use TLS 1.0 is checked.
  • Then, verify Use TLS 1.1 and Use TLS 1.2 aren’t checked.
  • After that, click alright to close the window.
  • After that, close Internet Explorer.
  • Then, Reboot your computer. When restarted, reopen QuickBooks Desktop.
  • After that, move to download the update again.

Important Note: we are going to discuss here some Microsoft Windows operating systems, where 15215 error messages can occur, is Windows 8, 7, 10, XP, MS, 2000, and Windows Vista.

Solution 4: Restart Windows in Selective Start-up

  • Firstly, close your QuickBooks Desktop
  • Choose Run, on your pc, view below version of Windows
  • The Windows XP: Start > Run
  • Windows 7 and Vista: move to Start > All Programs > Accessories > Run
  • Windows 8 and 10: Push the Key and Letter R on your Keyboard
  • Go to the Run Field, enter msconfig. Click OK
  • Now, The System Configuration Utility opens
  • Choose the Selective Start-up on the present page and clear the Load Start-up items checkbox.
  • Save your changes by click the OK button
  • Now, restart your computer as prompted.
  • After the restart, reopen QuickBooks and download the newest tax table.
  • Follow steps 1 to 4 return to the System Configuration Utility, if you’ll successfully download the update.
  • Now, choose the simple start-up checkbox and click on OK
  • Now, Restart the pc again.

Solution 5: Installing Updates Manually

  • First, you’ve got to search for the update of QuickBooks to the newest edition.
  • And then assure that the product is chosen.
  • Now move to the “change option” and click on that, and later select the “QuickBooks product “.
  • Now you’ve got to decide on the “update option” and next choose the path where you desire to save lots of the file and click on the Save option.
  • After downloading, you would like to double-click on the “install the update option “and install it.
  • You must restart your windows after the installation is finished.
  • Once the above process is complete, the user must open “QuickBooks” to check if he is updating the newest and press the “F2” key.

From time to time we post many tutorials and informative blogs for various issues and problems faced by our users. But still, If the users are not able to fix their problem. Or unable to repair QuickBooks Error 15215 own, you must not worry. Contact our team and acquire appropriate help from our certified experts.

How To Fix QuickBooks Error Code 20 (Printer Not Activated)?

quickbooks-error-20

Today you’ve got problems printing from QuickBooks with QuickBooks Error Code 20 desktop. Nothing prints from QuickBooks “Printer not activated”. QuickBooks Printer not activated Error Code 20 is that the result of Upgrade to Windows 10, otherwise your effort to print from QuickBooks 2009 installed on a Windows 10 system. QB 2009 is an outdated version that has problems printing from Windows 10, caused by compatibility issues. QuickBooks 2009 closed getting automatic updates as its official support supervised to May 2012. QuickBooks 2009 was engineered to run on Windows 7, the most recent of these times, and technically your data is additionally 10 years behind the present QB Desktop version.

Windows 10 updates twice a month and your QuickBooks 2009 doesn’t and roots compatibility issues during a type of the QuickBooks Error Code 20. Don’t be too wondered, if your QuickBooks Company File stopped working.

Alternatively, you’ll apply the interim solution to repair QuickBooks Printer not activated Error Code 20, before you choose to upgrade QuickBooks to the newest version.

What Causes QuickBooks Error Code 20?

  • QuickBooks 2009 compatibility Issues with windows 10.
  • Non-updated QuickBooks 2009.
  • The application key’s not updated.
  • Unsupported printer drivers either way.
  • QuickBooks Windows Registry Issues.

Solution Steps for QuickBooks Error 20 Printer not Activated

Here are some solution steps that provide you solutions for your problem.

STEP-1: Registry Backup and Restore Point

  • Backup Windows Registry.
  • Open the registry editor to add manual changes to that.
  • Open the file menu and export the registry and save it.
  • Create a restore point to revoke the changes made within the Registry if required.
  • Wait till the time system restore point creation process ends and click on OK when finished.

STEP-2: Configure User Permissions

  • Hit Window and type regedit within the search bar is OK.
  • Right-click on regedit and choose Run as Administrator.
  • Double-click the HKEY_CURRENT_CONFIG folder within the left Pan.
  • Right-click on the Software folder within the pan and choose the Permissions… option from the menu.
  • On the new window that pops up, assign “Full Control” to the “Users” if it’s not enabled and click on OK.

STEP-3: Configure Print Spooler Service

  • Press Windows + R at a similar time and type MSC within the Run box that appears.
  • Right-Click on the Print Spooler Service from the services menu and take “Properties”.
  • Stop the Print Spooler Service.
  • From the Startup Type dropdown, select Automatic
  • Now Click Start the service again.
  • Try and print something or Save a PDF, this could resolve “QuickBooks Printer not activated Error Code 20”

STEP-4: Repair QuickBooks PDF component QBprint.qbp file

  • Open your Windows control panel and move to Programs and Features
  • Select QuickBooks from the list of the installed program.
  • And click on Change and begin the repair process and follow the instruction till the end.
  • Restart the pc after the QuickBooks Repair process finishes.
  • Try and print something or Save a PDF, this could resolve QuickBooks Error Code 20

STEP-5: Updating Windows and Reinstall QuickBooks from the scuff

  • Open your Windows control panel and move to Programs and Features
  • Write your QuickBooks License and product Number before you uninstall QuickBooks
  • Select QuickBooks from the list of installed programs and choose Uninstall from the top.
  • Follow the wizard instructions till QuickBooks Uninstall
  • Download and install the Windows Updates and restart the pc.
  • Insert the installation CD or open the QuickBooks Installation folder to begin the setup.
  • Follow the installation instructions to put in QuickBooks.
  • Since QuickBooks Reinstallation does resolve many QuickBooks Errors, you must be ready to print now.

STEP-6: Troubleshooting the Microsoft Document Writer – Windows Component

Microsoft Document Writer is a preinstalled Windows component that assists print to file. It enables Windows to assist the QuickBooks applications to save information in PDF. If this component is missing or corrupted, you get in problem printing from QuickBooks on Windows 10 and face QuickBooks Printer not activated Error Code 20 as a result.

  • Right-click on QuickBooks Icon on your desktop and choose the Open File Location option from the menu.
  • Move to the Temp folder and search for the folder that represents the version of your QuickBooks.
  • Open the Third Party Folder then
  • Locate and double-click the exe file and let the installation complete.
  • Open QuickBooks once to register the license.
  • Just in case of issues installing ABS PDF driver or it stops responding, try installing again.
  • Once the installation completes try printing again to verify QuickBooks Error Code 20 if fixed.

Hopefully, the resolution steps helped you fix QuickBooks Printer not activated Error Code 20 following one among the 6 steps or all of them suggested. If the errors continue then you’ll contact the professionals. They’ll be ready to guide you better with the solutions.

How to Troubleshoot QuickBooks Error 6130 in Minutes?

quickbooks error 6130

QuickBooks Error 6130 occurs when you’re opening the corporate file. Error Code 6130 arises when there is also an issue with the corporate file.

Here we’ll discuss the causes and solution steps to fix it.

Causes for QuickBooks Error Code 6130

  • QuickBooks desktop installation is corrupted/damaged
  • QuickBooks company file corrupted
  • .ND and .TLG files are damaged
  • QuickBooks isn’t running with all the admin rights

Symptoms of QuickBooks Error 6130

Check out the trait of QuickBooks Error Code 6130 as given below:

  • Error 6130 appears on the computer display with frequent active window crashes
  • The computer frequently crashes with this error while running the same program
  • Error Code 6130 will appear on the display
  • The system windows run sluggishly
  • The mouse and keyboard inputs work slowly
  • Computer “freezes” repeatedly after the short interval of time-frames

3 Simple Steps to repair QuickBooks Error 6130

Check out the solution steps of QuickBooks Error 6130 as given below:

Step 1: Download and Run QuickBooks File Doctor

  • Download QuickBooks Tools Hub and move to your downloads by pressing CTRL+J
  • Under your downloads list click on QuickBooksToolsHub.exe
  • Click yes to permit this app to generate changes
  • Now click on Next to install it then click Yes repeat for receiving the license agreement
  • Tick on Next then Install (It may take a few time)
  • Once the installation is complete click on Finish
  • Now open QuickBooks Tool Hub (Icon are available on your screen)
  • Under the corporate File, Problems tab click on Run QuickBooks File Doctor
  • Then click on Browse to search out your file
  • Select the file and click on Open
  • Now prefer to Check your file and click on Continue
  • Then enter your file password and click on Continue
  • Now scan will begin, it’s going to take your time to diagnose, looking at your company file size. Once the scan is completed open your QuickBooks your issue is also resolved.

Step 2: Update QuickBooks Desktop

  • Open QuickBooks Desktop
  • Then move to Help > Update QuickBooks Desktop
  • Then click on Update Now to the top of the right corner
  • Now create a check on Reset Update and click on Get Updates
  • Once Update is complete, close QuickBooks

Step 3: Run Verify and Rebuild Utilities

Run Verify Utilities

  • Open QuickBooks Desktop
  • Go to File > Utilities > Verify Data
  • Click alright to close all open windows
  • If QuickBooks doesn’t detect any problem together with your data click OK
  • If QuickBooks found some issues together with your data click on Rebuild

Run Rebuild Utilities

  • Go to File > Utilities > Rebuild Data
  • Click OK then Save to make a backup
  • Once rebuild has been completed click on View Results
  • If you found any issues together with your data, you’ll speak with our experts

Step 4: Rename the .ND and .TLG Files

.ND and .TLG files assist you to run QuickBooks company files on web and multi-user mode. If these files are corrupted or damaged that may generate you QuickBooks Error 6130 and renaming these files can assist you to fix it.

  • Open your QuickBooks company file path C:\Users\Public\Documents\Intuit\QuickBooks\Company File [Default path]
  • Now search for the files that have .ND and .TLG extensions.
  • Make a right-click on them and choose Rename, Now type “.OLD” at the last of the file
  • For Example, CompanyName.qbw.ND now changes it to CompanyName.qbw.ND.OLD
  • CompanyName.qbw.TLG now changes it to CompanyName.qbw.TLG.OLD
  • Click yes to verify.

After following all the above steps you’ll not face QuickBooks Error Code 6130 but just in case it still exists you’ll connect with our experts.

How to resolve installing abs pdf driver issue in QuickBooks?

quickbooks stuck installing abs pdf driver

ABS PDF driver could be a windows component that’s required to execute pdf features within QuickBooks. It’s a windows component developed by Microsoft. During this blog, learn the way of installing ABS pdf driver in  QuickBooks.

A common installation error occurs while installing QuickBooks desktop. When a user is trying to install QuickBooks Desktop & the installation gets stuck in between. QuickBooks desktop requires the ABS Pdf driver component to complete the installation.

This problem usually occurs when there’s a slow internet connection or because of an inside system problem. Also, it’s important to install an ABS PDF driver because it helps print the transactions in QuickBooks Desktop.

In this post, we’ve discussed the causes and solution steps to repair this issue.

Causes of QuickBooks Stuck on Installing ABS PDF Driver

  • Slow internet connection
  • QuickBooks installer not working
  • You are not connected to the net
  • QuickBooks Installer is corrupted

3 Simple Steps to repair When QuickBooks Stuck on “Installing ABS PDF driver” Screen

Performing these steps to fix your  problem QuickBooks stuck Installing ABS PDF driver, continue with QuickBooks desktop installation.

Step 1: Download and Install QuickBooks Tool Hub

  • Download QuickBooks Tool Hub and move to your download by pressing CTRL+J
  • Under your downloads list click on QuickBooksToolsHub.exe
  • Click yes to permit this app to create changes
  • Now click on Next to install it then click Yes again for accepting the license agreement
  • Click on Next then Install (It may take some time)
  • Once the installation is complete click on Finish
  • Open QuickBooks Tool Hub (Icon are available on the desktop)

Step 2: Run quick fix my Program

  • Open QuickBooks Tool Hub (downloaded in step 1)
  • Go to the Program Problems tab and click on the fast Fix my Program
  • It may take a while to run
  • Once completed, proceed further with Step 3

Step 3: Run ABS PDF Driver Setup

  • Press Windows+R keys together to open the Run command
  • Type to try to click ok. This shortcut will open the Temp folder
  • Now search for PrX_usXXrX or Enterprise_usXXrX folder and open it
  • Note: X represents the version, year, and release of your QuickBooks Desktop. For instance, QuickBooks Pro 2020 R4 will show as Pro_us31r4.
  • Click on the Third-Party folder
  • Double clicks on ABSPDF412Setup to run the installation and once it’s completed.
  • You can open the QuickBooks Desktop and register your product
  • If an equivalent problem still occurs, it’s suggested contacting your IT person to diagnose your computer issue.

After performing these steps, continue with QuickBooks desktop installation.

If the above steps don’t assist you to install the ABS pdf driver in QuickBooks & you’re still stuck on the installer. you’ll need the support of an IT expert.

Read Also: To download QuickBooks 2018 through the web, you can visit our website Downloads & Updates page and choose your version. Then, proceed with installing QuickBooks Desktop.

How to Solve QBCFMonitorService not running on this computer Error?

qbcfmonitorservice-not-running

One of the crucial QuickBooks services is QBCFMonitorService also mentioned as QuickBooks Company File Monitoring Service which is executed from the qbcfmonitorservice.exe file located within the QuickBooks installation directory, usually inside “C:\Program Files\Common File\Intuit\QuickBooks” folder. QBCFMonitorService not running on this error message arises when a user seeks to run QuickBooks Database Server Manager to install multi-user mode.

However, once you check the status of the service in the service window, you’ll find the service running with no issues. You may require to utilize multiple fixes to urge eliminate the QBCFMonitorService not running on this computer error message. Follow the entire article for detailed troubleshooting instructions.

What Causes is QBCFMonitorService not running on this computer Error?

Many reasons account for QuickBooks displaying QBCFMonitorService not running on this computer error message. One among the main problems of errors associated with QBCFMonitorService is Windows Defender and third-party firewall applications that restrains QuickBooks reference to the corporate file stored on the server. Following are some more problems that cause QBCF Monitor Service to stop on Windows:

  • QuickBooks installed on the server isn’t properly set up to host company files during a multi-user environment.
  • For some reason, QBCFMonitorService isn’t running or stopped on the server hosting the corporate file.
  • Accidentally the QuickBooks Database Manager Service file (qbcfmonitorservice.exe) is deleted from the server.
  • You are using an outdated version of QuickBooks Database Server Manager on your Windows computer and also the server. (Install and Update QuickBooks Database Server Manager Now)

Resolve QBCFMonitorService Not Running on This Computer

Below are some solution methods to resolve this error. Please read them carefully and fix this problem easily.

Solution 1: Confirm QuickBooks Multi-User Hosting set up on the Server

  • Open QuickBooks Desktop and click on the File tab.
  • Move your mouse cursor over the Utility option.
  • Select the choice that says Host Multi-User Access.
  • Once you get the confirmation box click Yes.
  • Make sure you’re activating hosting only on the server.
  • Make sure that the Multi-user Hosting isn’t running on any of the workstation computers.
  • To verify open QuickBooks and move to the File tab.
  • If you see the option Switch to Single-User mode, then it means the QuickBooks is running under multi-user mode, and you require to click Switch to Single-User mode.
  • If you see the option that says Switch to multi-user mode, then this means that the application is already running under single-user mode and no changes in settings are required.

Step 2: Install the Updates of QuickBooks Database Manager Server

  • Follow the link and verify the newest release of the QuickBooks Database Manager server for your QuickBooks version.
  • QB Desktop 2018
  • QuickBooks Desktop 2019
  • QuickBooks Desktop 2020
  • Now open QuickBooks if you’re not having the recent updates and patches installed.
  • From the assistance tab click Update QuickBooks
  • Checkmark all the QuickBooks features and releases under the Update Now tab.
  • Click Get Updates and wait until the application installs all the available updates.
  • Make sure to restart QuickBooks Desktop on both the server and workstation after the update.

Step 3: set up QuickBooks Database Manager Service

  • Press Windows + R on your keyboard and write services.msc in the run box
  • Click OK or hit Enter.
  • Search for the QuickBooks DBXX service in the list of services.
  • If you discover the service status as stopped, then right-click the service and choose Properties.
  • Under the overall tab change the Startup Type to Automatic from Manual.
  • Now move to the go browsing tab and set the option to Local System Account from This Account.
  • Move to the Recovery tab and from the drop-down list of the primary failure, second failure, and subsequent failure select restart the Service.
  • Now click Apply and OK.

If you’re still having problems accessing the corporate file on the server and if QuickBooks remains displaying QBCFMonitorService not running on this computer then you may require to reinstall the entire QuickBooks Desktop application using the QuickBooks Clean Install Tool. If you don’t feel comfortable applying the troubleshooting steps mentioned during this article.

Is QuickBooks Error 179 troubling you?

QuickBooks-error-179

QuickBooks Error 179 occurs once you attempt to log into the bank’s site on your computing system. As a consequence of the occurrence of the QuickBooks error, it restricts you to log in. If you would like to use the banking services as you were using before, then attempt to find out the causes of QuickBooks error 179.

Let’s discuss the common possible causes of QuickBooks error code 179 that are affecting your accountancy tasks.

Causes of QuickBooks Error 179

You can fix the QuickBooks error code 179 by surfing the possible causes:

  • Firstly, there could be some problems within the reports, like negative values on the invoices or bills.
  • Chances are there that the transactions are missing in QuickBooks.
  • You will see errors within the QuickBooks company file.
  • Maybe you’ve got used the incorrect credentials to log in.
  • Along with this, there are multiple logins from quite one device.
  • Your computer is infected with a pandemic attack.
  • Bad network connection in your computing system.
  • There is a cache issue with a web browser.
  • Your balance sheet reports aren’t showing all accounts.
  • There is an opportunity that there are some issues together with your company file.
  • Lastly, you’ve got forgotten to log off of your last session.

Before implementing the troubleshooting steps, you would like to create certain that you simply aren’t logged in to your bank from other devices. Additionally, you need to verify internet connectivity on your PC before fixing the problem. Furthermore, it’s better to resolve the problem as soon as possible because the error could damage your workflow severely. Let’s discuss the methods to troubleshoot QuickBooks error code 179.

Methods to resolve QuickBooks Error 179

Here are the assorted methods are given to troubleshoot the error code. Read the methods to repair the problem from your end:

Method 1- Log off From Online Banking Account

  • First of all, you require signing out of the bank website from all the pc systems.
  • Thereafter, you require to verify that nobody is using equivalent credentials to log in.
  • Then, you have to log in to the bank website as an administrator

Method 2- Clear Browsing Data

  • Initially, you have to open Google Chrome then click on the three dots that are visible to you on the system’s screen.
  • Secondly, you require deleting the browsing history comprising of the Cache too.
  • You have to log in again to your bank’s website.

Method 3- Update Your Bank in QuickBooks

  • To start with, you require running QuickBooks Desktop then moving to the Tools.
  • Then, you’ve got to click on the web Centre.
  • After this, you require to choose the financial organization then click on the selection you want to choose.
  • Now, you have to press CTRL+F3.
  • You need to again move to the web Centre then click on the Contact Info option given.
  • You have to refresh the financial organization.
  • After this, you’ll see the profile info appeared on your system screen. It’ll ask to update QuickBooks.
  • You need to click on the Update/Send option.
  • Then, you require entering the password if necessary.
  • Next, once more you have to update your account.
  • At last, you’ll move to the subsequent method if the problem isn’t fixed.

Method 4- Repair Windows Registry

  • To begin with, you are required to click on the start button then type Command in the search option then press Enter.
  • Type Regedit in the black box that’s visible on your system’s screen.
  • Then you require picking the error 179 related key.
  • With this, you’ve got to save the key information.
  • Then, you require making a file and naming it.
  • Next, select .reg extension then saves it.
  • Finally, you require doing to log in again to the bank website to create sure that the error is resolved or not.
  • These methods resolve the respective QuickBooks issue without any difficulty. Together with this, you’ll easily access your bank account within QuickBooks Desktop without any hurdle.

Conclusion:

So far, the blog covers what QuickBooks error 179 is all about. Apart from this, the blog talks about the possible causes of the error and in what alternative ways the error is often solved. The behavior of your company’s file and data won’t get affected after implementing the various effective methods.

Ctrlr