

iPhone has been used for many years, there is no easy way to download custom ringtones to your library, but you can. If you don’t want to use or buy ringtones that are already on your iPhone, create your free ringtones with Free Ringtones.
This process has changed slightly with Free Ringtones 12.7. The “tones” previously available on the iPhone have been removed, but you can still manually download the ringtone to your phone. All ringtones you download from the Free Ringtones can be found at C.
Step 1: Get Free Ringtone from Free Ringtones
Modern iPhone users usually don’t need to download other ringtones, but they need to use custom ringtones.
You need to install Apple’s Klingeltöne kostenlos on your Windows PC. Ringtones’ Apps are already installed on your Mac and you can start using them right away. This process works on either a Windows PC or a Mac.
The steps in this article will work even if you are using Windows free ringtones, or if you are using an older version of macOS that still contains free ringtones.
Step 2: Select a file
Of course, you need an audio or video clip to convert it and use it as a ringtone. Everyone has an idea of what they want to use as a ringtone. If you’re not sure, go to Google and find what you like. You can use any audio or video file.
The selected ringtone file cannot exceed 40 seconds. The Free Ringtones refuses to use the ringtone on your iPhone for more than 40 seconds.
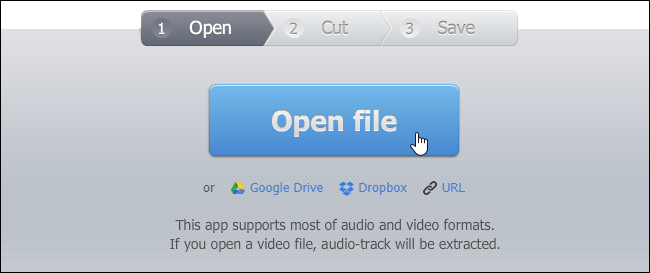
If you need a file longer than 40 seconds, you can use an audio editor to cut out the required part of the file. You can use any audio editor. For editing sound files, I recommend a simple tool called mp3cut.net. Go to the website, click the Open button and select the file you want to edit. You can also select the video file from which you want to extract the audio.
Now select the part of the audio or video file you want to use and press the Cut button.
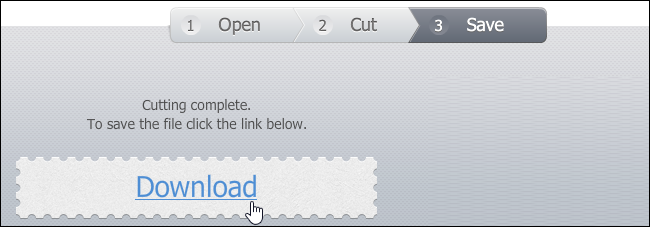
And you can download audio clips to your PC. This is the file you need to import into your Free Ringtones.
Step 3: Convert MP3 to AAC
After downloading, the file will be in MP3 format. To use it as a ringtone, you need to convert it to an AAC file (if you are already using the AAC format, you can skip this part).
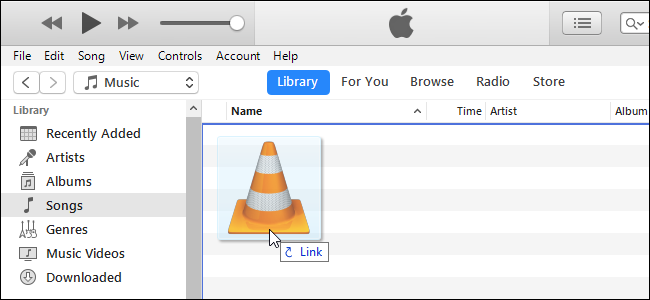
First, add the sound file to Free Ringtones and find it in your library. To do this directly, copy the file or drag and drop it into the Free Ringtones library. Then go to Library> Songs and check the files in the file.
Select the sound file in Free Ringtones and click File> Convert> Create AAC Version.
Step 4: Rename the AAC file The
Free Ringtones library will eventually get two audio files, the new AAC file, and the original MP3 file.
To record what is which, right-click the file source heading and activate the Type column.
The new column Type indicates which file is which. The “MPEG audio file” is the original MP3 file and the “AAC audio file” is the new AAC file. You can right-click the MPEG file and remove it from the Free Ringtones library.
You will have your file as AAC audio file. However, you need to change its file extension so Free Ringtones will recognize it as a ringtone file.
First, drag and drop the AAC file from the Free Ringtones library to your Desktop or any other folder on your PC or Mac.
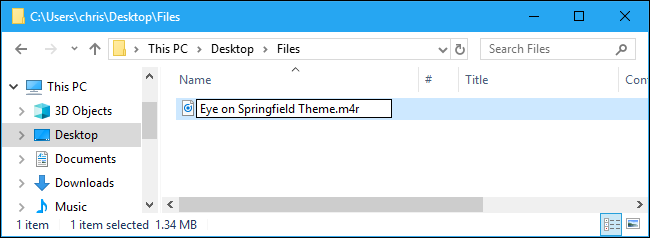
Now you will have the AAC audio file with the .m4a extension. But you have to change the extension to .m4r. For example, you need to change the file song.m4a to song.m4r.
Step 5: Transfer audio ringtone files to phone
Next, connect your iPhone to your PC or Mac using the same cable used to charge your iPhone, the USB to Lightning cable.
After unlocking your iPhone, if you haven’t connected your iPhone to Free Ringtones on this PC or Mac, tap the Trust button. You need to enter the PIN.
Under Free Ringtones, click the device icon to the left of Library in the navigation bar.
Click the Tones section under Device in the left sidebar.
Drag the ringtone file from the folder to the Tones section of the Free Ringtones.
Update: If drag and drop don’t work, use copy and paste. Select the ringtone file and press Ctrl + C or right-click and select Copy. Then click the Free Ringtones Sounds list and press Ctrl + V to paste.
Free Ringtones syncs your ringtone with your phone and will appear immediately under Sound here.
Step 6: Select Ringtone
Now you can take your iPhone and go to Settings> Sounds and Haptics >> Ringtones to select your custom ringtone. All custom ringtones will appear at the top of the list here.
You can also select a specific ringtone for a specific contact and know who is calling just by the tone of the tone.
To remove the ringtone, reconnect your phone to a Free Ringtones and go back to the On Device> Sound section. You can also remove the tone from your device or phone by right-clicking on the tone and selecting Remove from Library.
Best Way to add free ringtones from Free Ringtones to the iPhone?
iPhone has been used for many years, there is no easy way to download custom ringtones to your library, but you can. If you don’t want to use or buy ringtones that are already on your iPhone, create your free ringtones with Free Ringtones.
This process has changed slightly with Free Ringtones 12.7. The “tones” previously available on the iPhone have been removed, but you can still manually download the ringtone to your phone. All ringtones you download from the Free Ringtones can be found at C.
Step 1: Get Free Ringtone from Free Ringtones
Modern iPhone users usually don’t need to download other ringtones, but they need to use custom ringtones.
You need to install Apple’s Klingeltöne kostenlos on your Windows PC. Ringtones’ Apps are already installed on your Mac and you can start using them right away. This process works on either a Windows PC or a Mac.
The steps in this article will work even if you are using Windows free ringtones, or if you are using an older version of macOS that still contains free ringtones.
Step 2: Select a file
Of course, you need an audio or video clip to convert it and use it as a ringtone. Everyone has an idea of what they want to use as a ringtone. If you’re not sure, go to Google and find what you like. You can use any audio or video file.
The selected ringtone file cannot exceed 40 seconds. The Free Ringtones refuses to use the ringtone on your iPhone for more than 40 seconds.
If you need a file longer than 40 seconds, you can use an audio editor to cut out the required part of the file. You can use any audio editor. For editing sound files, I recommend a simple tool called mp3cut.net. Go to the website, click the Open button and select the file you want to edit. You can also select the video file from which you want to extract the audio.
Now select the part of the audio or video file you want to use and press the Cut button.
And you can download audio clips to your PC. This is the file you need to import into your Free Ringtones.
Step 3: Convert MP3 to AAC
After downloading, the file will be in MP3 format. To use it as a ringtone, you need to convert it to an AAC file (if you are already using the AAC format, you can skip this part).
First, add the sound file to Free Ringtones and find it in your library. To do this directly, copy the file or drag and drop it into the Free Ringtones library. Then go to Library> Songs and check the files in the file.
Select the sound file in Free Ringtones and click File> Convert> Create AAC Version.
Step 4: Rename the AAC file The
Free Ringtones library will eventually get two audio files, the new AAC file, and the original MP3 file.
To record what is which, right-click the file source heading and activate the Type column.
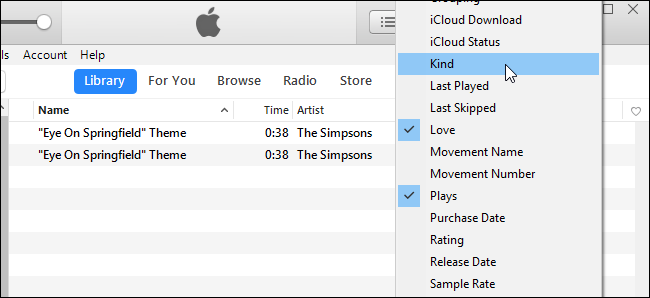
The new column Type indicates which file is which. The “MPEG audio file” is the original MP3 file and the “AAC audio file” is the new AAC file. You can right-click the MPEG file and remove it from the Free Ringtones library.
You will have your file as AAC audio file. However, you need to change its file extension so Free Ringtones will recognize it as a ringtone file.
First, drag and drop the AAC file from the Free Ringtones library to your Desktop or any other folder on your PC or Mac.
Now you will have the AAC audio file with the .m4a extension. But you have to change the extension to .m4r. For example, you need to change the file song.m4a to song.m4r.
Step 5: Transfer audio ringtone files to phone
Next, connect your iPhone to your PC or Mac using the same cable used to charge your iPhone, the USB to Lightning cable.
After unlocking your iPhone, if you haven’t connected your iPhone to Free Ringtones on this PC or Mac, tap the Trust button. You need to enter the PIN.
Under Free Ringtones, click the device icon to the left of Library in the navigation bar.
Click the Tones section under Device in the left sidebar.
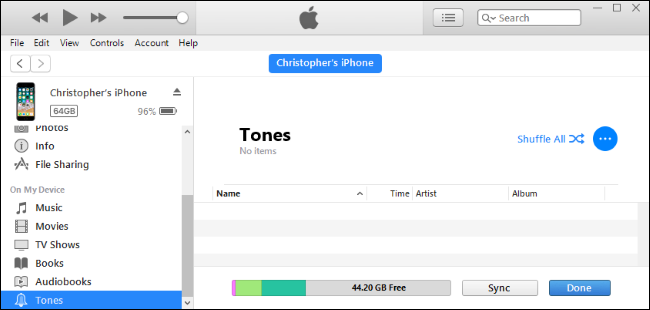
Drag the ringtone file from the folder to the Tones section of the Free Ringtones.
Update: If drag and drop don’t work, use copy and paste. Select the ringtone file and press Ctrl + C or right-click and select Copy. Then click the Free Ringtones Sounds list and press Ctrl + V to paste.
Free Ringtones syncs your ringtone with your phone and will appear immediately under Sound here.
Step 6: Select Ringtone
Now you can take your iPhone and go to Settings> Sounds and Haptics >> Ringtones to select your custom ringtone. All custom ringtones will appear at the top of the list here.
You can also select a specific ringtone for a specific contact and know who is calling just by the tone of the tone.
To remove the ringtone, reconnect your phone to a Free Ringtones and go back to the On Device> Sound section. You can also remove the tone from your device or phone by right-clicking on the tone and selecting Remove from Library.
Click here for more interesting articles