Step by Step Upgrade Latest QuickBooks Desktop 2021 | Bigxperts

Upgrade to QuickBooks 2021

QuickBooks is a creative bookkeeping and accounting software that is utilized by a huge number of business proprietors and accountants all throughout the planet. However, to take advantage of QuickBooks, one should keep it updated to the latest version?

QuickBooks update and upgrade are two distinct things. Upgrade adds valuable features to the software and must be performed utilizing a CD Rom. In case you are intending to refresh this accounting software, you can peruse this speedy guide and get the latest QuickBooks updated from the internet straightforwardly. These updates are otherwise called support discharge for “patches.” The updates improve the presentation of QuickBooks and likewise fix many known issues automatically. This load of updates comes at no additional expense for product releases. You can download these updates to upgrade your company’s productivity.

In this article, we will tell you the total system of refreshing the QuickBooks desktop to latest release version. Be that as it may, to accelerate the update process, you can likewise contact our nonstop QuickBooks support team. We are a center point of educated accounting professionals, who work the whole day and night to offer the most ideal help administrations to QuickBooks clients. Accordingly, don’t spare a moment to call our experts, and our delegates will hit you up with the most ideal support administrations.

Benefits of Refreshing QuickBooks Desktop Version

Refreshing the QuickBooks desktop version is not the same as redesigning the version of the merchandise, similarly as, Intuit much of the time releases refreshes for its different versions of QuickBooks, for example, 2017, 2018, 2019, 2020, and 2021 through this sort of update is released just one time each year. There are sure advantages of refreshing the version of the QuickBooks desktop application.

  • You will actually want to refresh to ensure better security of the data.
  • It additionally guarantees blunder-free client information.
  • This purpose challenges some normal security loops and bugs.
  • Ongoing receipt status following, improved data file, and so on are a few characteristics that are seen while refreshing QuickBooks.
  • Optimization characteristic and more.

How to Check Whether you Have the Latest Update or Not?

Before you update your QuickBooks desktop, it ought to be noticed that refreshing normally takes a slight change to the database. These progressions would not make the data file intelligible with prior releases. You need to guarantee to have the QuickBooks desktop patch. For distinguishing whether you are having the latest update or not, you need to have two or three stages recorded beneath:

  • You need to initially open the QuickBooks desktop.
  • And then press F2 for opening the product data window.
  • The following stage is to check the current version and delivery.
  • Verify the available QuickBooks discharge.

How you can Refresh QuickBooks Desktop to Latest Release?

You can utilize four methods to download the update from the internet. Every technique would expect you to have a quick and solid internet connection.

  • Automatic update technique (default setting)
  • On-demand (quick) update technique
  • Delivery download
  • Manual update

Once you download the updates, all the significant company files will automatically be installed to the right location on your computer. Every one of the updates, post downloading the updates, would automatically be provoked. You would get a notification to install the update the following time at whatever point you would start the accounting software. In some cases, you shut down and restart QuickBooks for the update to produce results. In the event that you have QB for multi-users, install the reports on all computers. You can likewise look for a professional’s recommendation or help in the event that you use QuickBooks in multi-user mode.

Method 1: Automatic Update Technique

This basic strategy checks Intuit administrations for new updates. The available updates are only downloaded when you are not utilizing your QuickBooks and the internet. And it will download the available updates when you are not utilizing the internet. To check if the software is running or not, this strategy itself downloads refreshes from the Intuit worker. You, be that as it may, have the decision to impair the automatic update option in the event that you don’t wish to refresh your software.

Download and Install Automatic update now

First of all you need to open the QuickBooks software and then move to the help menu. After that select the Update QuickBooks tab.

  • Once done with that, you need to click on the Update Now tab, in the update QuickBooks screen.
  • The next step in the process is to erase all the previously downloaded updates and then tick mark the reset update box.
  • Now select the Get updates icon.
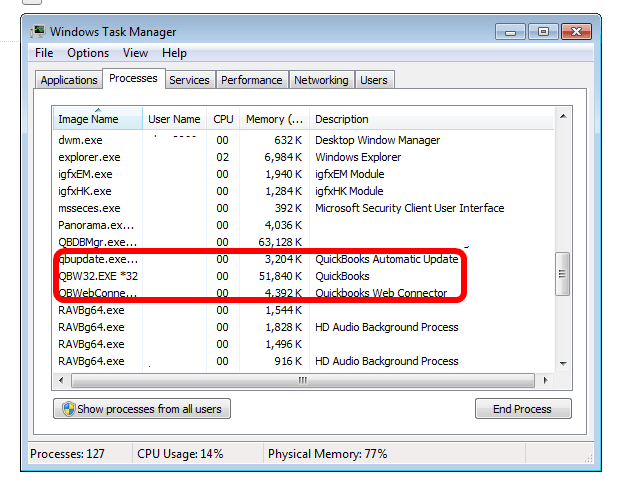
  • You need to end the process to restart the QuickBooks application.

Steps to Enable or Disable the Automatic Update Option for the Future:

  • Go to the help menu and click on update QuickBooks.
  • Next hit a click on the options tab in the Update QuickBooks window.
  • Select the option of your choice. After that choose Yes to enable and No to disable the option for QuickBooks.
  • Select the update you wish to receive and take out the unnecessary updates from the update section if for enabling the automatic update option.
  • In case you disable the option, you will stop receiving all not notifications even if there are notifications available on the Intuit server. This feature is just to remind you to check updates and doesn’t always mean that an update is available.
  • Next hit a click on Save and then Close.
  • The above-mentioned steps are for enabling and disabling the QB update option, you can move on to the next step to update your QuickBooks Desktop to the latest release.

Method 2: Immediate Update Method

This technique allows you to download the updates straightforwardly from the Intuit worker. It doesn’t need QuickBooks to be running in your framework and can be utilized whenever. You can utilize this technique to download refreshes regardless of whether you have empowered Automatic Update. It’s prudent to check for refreshes once every month.

How to check for refreshes and install them?

  • Open QuickBooks and go to the Help menu.
  • Snap-on Update QuickBooks and then Update Now.
  • Select the update you need to download and tap on getting Updates. Here, you can likewise realize what everything is remembered for the update from the Update segment. Tap on the Maintenance Release connect. Another page will appear with changes/enhancements in the update.
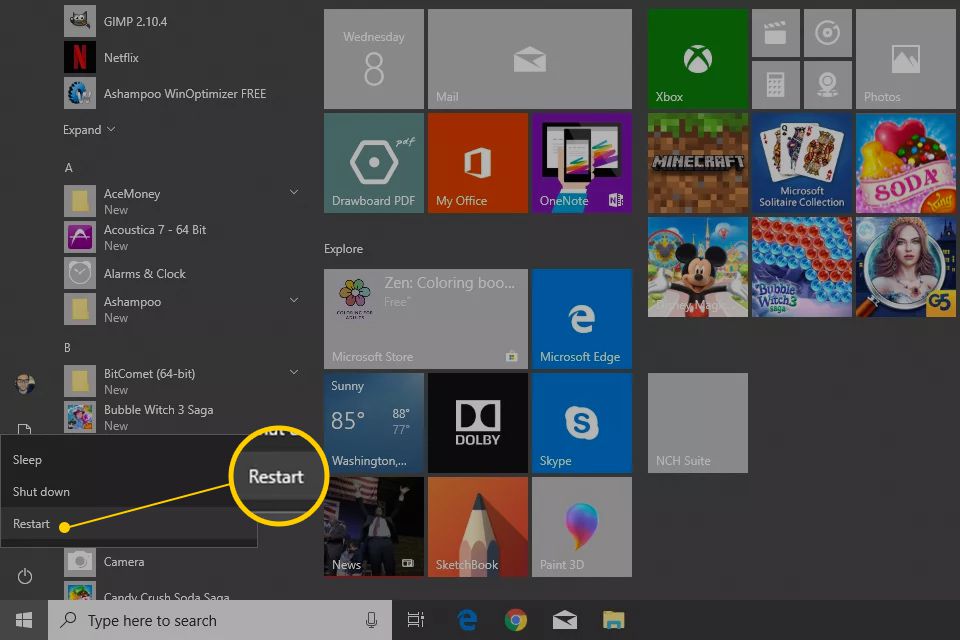
  • Close down your QuickBooks. Next time when you will utilize your QuickBooks, you will get a brief to install the update. You can decide to download it now or later. Restart your computer after the installation is finished.
  • Consider re-installing the updates in the succession they show up in. Not after the gave succession might prompt issues in opening the company file.

Method 3: Release Download

In case you are experiencing issues with the update element or you wish to install refreshes through the update include, you can continue to download and install available updates. It’s prescribed to utilize the update include for installing QuickBooks Updates. You should guarantee to refresh all duplicates in the event that you utilize multiple duplicates of QuickBooks. Not doing this might prompt issues in opening the company file.

QuickBooks Pro and Premier: Download refreshes for multi-user mode

In case you are a QB pro or premier user and use multi-user mode, make a point to install refreshes on each framework. Connect your computers to the internet and download and install the updates. You can likewise download the report on one computer on the organization and later offer it.

  • Steps to share the updates
  • At first, open the common company files.
  • Then, go to the Help menu and snap-on Update QuickBooks.
  • Go to the Options tab.
  • Set Yes for the Share Download option.
  • Then, hit the Save button.

Once you apply every one of the mentioned steps, the updates that you have downloaded will be shared to all computers. The updates get downloaded at the location in QuickBooks where, subsequent to turning on the offer option, your company files will be found. Presently, you ought to install new delivery refreshes for your QuickBooks company file. If it’s not too much trouble, note that the company files may not stay open utilizing the previous releases of the accounting software in the wake of being updated.

Method 4: Get updates from the Internet and download QuickBooks (Manual)

  • First of all, you need to visit the Downloads and Updates page.
  • After that, from the Select Country drop-down list, click on your country.
  • And then from the select product drop down, you need to select the product accordingly.
  • Once done with that, make sure to select the version from the Select Version drop-down.
  • The next step is to select the search option.
  • Followed by clicking on the getting updates option.
  • Towards the end, you are required to save the downloaded file somewhere that’s easy to spot.

Method 5: Ultralight Patch (ULIP) – Optional

Discussing the ULIP which stands for Ultra Light Patch, is a characteristic in QuickBooks desktop, where minor yet fundamental fixes can be sent with no delivery limitation.

It ought to be remembered that the patch discharge strategy can continue for what it’s worth. Ensure that the fundamental fixes option is chosen prior to moving the updates.

Steps for physically refreshing QuickBooks desktop:

  • You need to download the latest version and later move it all to the company files and QuickBooks.
  • And then move to the windows start menu and search for the QuickBooks desktop, on the QuickBooks desktop give a right snap and select the run as administrator.
  • From that point onward, on the no company screen, click on the help menu and snap-on update QuickBooks desktop.
  • Followed by, tapping on the mark all and later select save money on the options tab.
  • The subsequent stage is to hit a tick on the update now tab and then snap on the reset update checkbox.
  • The last advance is to tap on getting refreshes.

Update QuickBooks Desktop for Mac to the latest Release

For refreshing QuickBooks Desktop for Mac, you can check out the means underneath:

In-Product Update

  • For in product update, you should float over the drop-down menu and then snap and select check for QuickBooks refreshes.
  • From that point onward, assuming a new version is available, you need to tap on install and update.
  • In the subsequent stage, you may get a caution for selecting install and relaunch.
  • Once the update process closes, the QuickBooks for Mac will automatically dispatch.

Manual Update

  • For manual updates, you should uninstall the more established version and then reinstall the more current one.
  • From that point onward, explore the QuickBooks product updates to reinstall the latest version.
  • The following stage is to select the desktop version and then download the installer file to the PC.
  • Presently double-tap the downloaded .dmg file and then drag the QuickBooks desktop icon to the applications organizer to install.

Conclusion

Here is all that you should think about refreshing QuickBooks Desktop to the latest release. In the event that you get any issues during the process or have some other issues, you can contact our QuickBooks Bigxperts team for speedy and exact solutions

How to Create a Statement in QuickBooks

How-to-create-a-statement-in-QuickBooks

Today, in this article we will talk about the methods to Set Up Statements in QuickBooks Online. The assertion is a sort of report that you ship off your customers. It contains every one of the exchanges made by the customer during a timeframe. Peruse the total article to know the importance, process of setting up, and customizing the assertion. Go through the article and get every one of your questions settled, here in this gave easy steps to set up statements in QB. For more info contact our QuickBooks.

Importance of Setting up Statements.

The assertion gives you the complete data regarding the billing of customers and the payment received from the customer throughout a certain period of time commonly one month.

A statement generally involves two types of transactions

  • Credit memos, Invoices and sales receipts that you have made.
  • Payment made by the customer.

There is no compelling reason to send an assertion to the customer in the event that you like to send them an invoice.

Besides, You are encouraged to send an assertion over the invoice to the customer. As it gives more itemized information to the customer who you are billing month to month, Quarterly or Annually.

Set Up The Company Information In QuickBooks Online

Instructions to set up the fundamental company information. The information includes company name, logo, address, email, site and lawful element information. This information will be utilized on the reports, customer invoices, and tax returns.

Why It Is Important To Set Up Company Information?

This is a vital thing to complete company information since what you give in this section will be influenced the contact information that shows up on the invoices, sales receipts, and gauges that you ship off your customers. If you don’t complete Company set up, by then you are likely going to encounter issues.

For instance, on the off chance that you send invoices to customers who you hope to mail you a check yet you didn’t set up your contact information in Company Settings, at that point your invoice won’t include your mailing address and your customers won’t realize where to mail payments to. There will be most likely postpone payment and result in an income issue for you.

Now, we will let you know the steps to set up the statement:

There is three choice to pick when setting up a proclamation. It relies upon what amount definite information you need to give to your customer.

  • Sign in to QuickBooks account then go to the Gear Icon>Account and Setting>Company settings.
  • On the left side of the menu Choose the Sales option.
  • Scroll down to select the statement option then you will get the three options.
    • The first option is to List each transaction as a single line.
    • The second option is to List each transaction including all details line.
    • The third one is Show ageing table at the bottom of the statement. This option provides a list of charges billed this categorized by how long they have been outstanding. Checkmark the box to enable this option.
  • Once you have made the changes then click on the save option.

Creating a statement from customers page

  • Click on the customer in the navigation bar (alternatively, Click invoicing > Customers, or Sales > Customers, it depends on what you are seeing)
  • Find the customer from the rows for which to create a statement.
Account_and_Setting_in_-QuickBooks_-Online
  • Click on the arrow near to the ACTION column and select Create Statement.
  • Once the Statement page is visible. Click on the Statement drop-down menu, and select the statement type you want to create. There are three types of statements from which you can choose.
    • Balance Forward: This statement contains the list of invoices and payments with balance for the selected date range.
    • Open item: This statement contains a list of open and unpaid invoices for the last 365 days.
    • Transaction Statement: In this statement, you can see the transactions for the selected time period.
  • After filling the date fields, click on the Apply.
  • Finally, select the Save, Save and Close, Save and Send, and Print or Preview.

Customize your statement

Whenever you have created the customer articulation then you can customize the assertion later. Adhere to the instructions underneath to alter the statements.

Screenshot_Statement_Settings_in_QuickBooks_Online
  • First, open QuickBooks and then go to the Preferences option.
  • Then, go to the Settings option and then select the Company Settings option.
  • Here, open the Sales tab and then scroll down to the bottom until you see the Customer Statements option.
  • After that, click on the Edit.
  • Select any one of the following:
    • List each transaction as a single line.
    • List each transaction including all details lines.
  • Then checkmark the box stating show ageing table at the bottom of the statement.
  • Select Save.

Wrap Up

You presently realize how to set your assertion choices in QuickBooks Online. The following tutorial in our QuickBooks Online Training Course is How to Set Up Expenses in QuickBooks Online. That tutorial will cover your accessible alternatives for tracking and billing costs to customers and the degree of cost detail to give on cost and buy structures.

Enable and use QuickBooks Messenger

Disable QuickBooks Messenger

QuickBooks Messenger is available when you’re utilizing QuickBooks Desktop in multi-client mode. The QuickBooks Messenger apparatus permits you to convey between employees logged into QuickBooks company record. Besides, with this messenger, the employees can examine any significant information identified with QB company data. Further, in the event that you need to utilize QB Desktop in single-client mode, debilitate QuickBooks Messenger by going to the utility segment.

Enable QuickBooks Messenger

QuickBooks Messenger consequently begins when you sign into QB Desktop. Essentially sign into your record and double-click on the symbol to dispatch the messenger. Notwithstanding, you can likewise go to the Company file and click on the choice “Chat with a Co-specialist”.

QuickBooks Messenger Chat

QuickBooks-Messenger-Chat
  • The initial step is to select the QuickBooks chat alternative to start a conversation with the other client.
  • You can likewise select a chat alternative from the notices window, you get informed when the other client is logged in.
  • The Admin can chat with different users by selecting Send Message to Logged In Users from the Actions

Change the Available Status

You can change your online available status (in the event that you need to show occupied or whatever else to different clients). Go to your username drop-down, pick the status reasonable for you.

Steps to Disable QuickBooks Messenger

If you don’t want to use the Disable QuickBooks messenger, follow the steps given below to disable the tool:

  • First of all, open QuickBooks from your system.
  • Now, select Switch to Multi-User Mode.
  • You have to sign in as an Admin.
  • After that, go to File Menu and click on Utilities.
  • Click on Disable Messenger.
  • Finally, log out of the company file and sign in again to check whether the chat is disabled.

Close Company File for Other Users

Follow the steps mentioned below to Close QuickBooks for other users:

  • Firstly, you have to open QB Messenger
  • Now, click on Chat with a Coworker.
  • From the Actions drop-down, click on Close Company File for Users.
  • Next, choose the users you want to restrict from accessing QuickBooks File.
  • Select Close Company File option.
  • A confirmation window will appear. Click on Yes.

Need Further Advice?

Here the article about Disable QuickBooks messenger finishes! Ideally, it is helpful for you to get mindfulness about the best option of QuickBooks for sending Messages on-spot while working. On the off chance that you have any confusion in regards to utilizing QB messenger or some other option, An accomplished group is staying there, devote attempting to give you an appropriate resolution on time. On the off chance that you can’t call through phone number, utilize a live visit option to pose inquiries or send an email with your concerns. The group will hit you up quickly.

How to Set up Direct Deposit for Employees in QuickBooks

How-to-set-up-direct-deposit-for-employees-QuickBooks

Burnt out on creating paychecks for your employees physically? Expecting you use the Quickbooks accounting software, you can have their registers directly saved with their ledgers. Quickbooks supports the use of direct deposits, facilitating the otherwise dreary and tedious undertaking of paying your employees.

Note: in the event that you wish to use this component, you’ll need to join and dynamic direct deposits in Quickbooks. Necessities for direct store incorporate the following:

  1. An upheld version of Quickbooks
  2. Dynamic Quickbooks payroll subscription
  3. Government Employer Identification Number (EIN)
  4. Web access
  5. Financial balance that supports Automated Clearing House (ACH) exchanges (there are no ‘wire’ charges related with ACH exchanges for most banks)

The process to activate and use QuickBooks Direct Deposit

Our favorite product item for setting up direct store is the online version of Intuit QuickBooks. We love the flexibility of this item, just as its usability. We will give bit by bit guidelines to setting QuickBooks up for utilizing direct store for employees. We’ll likewise examine some other items that may fit a specific business better, as QuickBooks isn’t ideal for each circumstance.

Steps to Set up a Employees for QuickBooks Direct Deposit

  1. Right off the bat, select Employees and afterward select the Employee Center to open the worker list.
  2. Presently, double tap on the worker’s name.
  3. Then, select the Payroll Info tab.
  4. After this, pick Direct Deposit button.
  5. In the Direct Deposit window, click on Use Direct Deposit for [employee’s name].
  6. Pick whether to store the paycheck into a couple of records.
  7. Enter the representative’s monetary foundation information that incorporates the Bank Name, Routing No., Account No., and Account Type.
  8. Assuming you wish to store to two records, you need to enter the amount or rate that the representative needs to store to the principal account in the Amount to Deposit field. The leftover amount is saved to the subsequent record.
  9. Pick OK to save the information.

Step-By-Step Guide to Setting Up Direct Deposit for Employees

Step 1: Set Up Direct Deposit

First off, set up the payroll bank account to put aside use of direct installment. The account must have the option to utilize ACH transactions. (Most accounts can deal with ACH, which is short for automated clearinghouse and is an electronic organization that handles bank-to-bank installments.)

Contact the bank and ensure the payroll account is qualified to use ACH and direct store. On the off chance that the bank should add this ability to the payroll bank account, it can take up to a couple of business days, contingent upon the bank in question, so plan in like manner.

Once the account is ready to go for direct deposit, enter the payroll bank account information into QuickBooks. Click Payroll on the left side, followed by Overview to set up the bank information. Scroll down to Connect Your Bank and click Start. Follow the instructions to find the bank information.

Step 2: Receive Your Employees’ Banking Information

To set aside use of direct installment, employees should give the company information about their bank accounts. QuickBooks gives a printable form to the employees to present this information, working on the cycle.

Employees should give marked and dated forms as authorization to send installments to their accounts. Along with the form, the representative should give a voided check to the account.

To get to the form, click on Payroll on the right-hand side of the QuickBooks window. Click Employees at the top of the window. Then either click on the name of the worker who will begin utilizing direct store or click the Add An Employee button to add the representative’s information, along with the direct store information.

In the wake of entering the information for a representative, dropping down the window, the last section will ask how the company needs to pay the worker. Select Direct Deposit starting from the drop menu. Then click on the Direct Deposit Authorization Form interface.

Step 3: Enter the Employees’ Bank Account Information

With the marked form close by, it’s an ideal opportunity to start entering the information for the employees into QuickBooks. (Comprehend that the employees probably won’t return these forms rapidly, so it might require a couple of days before the information is accessible for passage.)

Click on Enter Bank Info, which is in a similar section of the worker information window that gave the connection to print the direct store authorization form.

In the following window, enter the representative’s bank account information from the form. QuickBooks permits employees to have the whole paycheck stored into one account or to part the paycheck for store into two unique accounts. Enter the representative’s account type, bank directing number, and bank account number before clicking Save.

Step 4: Creating a Payroll Run

In the wake of entering the banking information for every worker, scroll upward to the center section of the window to the How Often Do You Pay section. This territory permits the HR office to set up the recurrence of running the payroll and presenting the direct store for this representative.

With QuickBooks, distinctive compensation plans for various employees is a chance, or the company can make one kind of pay plan for everyone in the company. This is a huge benefit of this payroll software, giving a lot of adaptability to how payroll runs for the company and employees.

3 Top Benefits of Setting Up Direct Deposit

With direct deposit, the business will send the employees’ wages directly to their bank accounts. There are a few benefits to this process versus making payroll payments through other methods.

Reduces Chances for Errors

When a business sets up direct deposit for employees, it lessens the chances for errors in payroll to occur, including:

  • No misprinted checks that require reprinting
  • No lost checks that require replacement
  • No need to physically hand out or mail checks
  • Correcting payroll errors is easier by making another deposit or reversing a deposit
  • Reduces chances of fraud occurring through employees writing their own checks

Removing Direct Deposit permanently from an employee’s profile

For not paying the direct deposit to an employee, you can remove them from the setup.

  • Firstly, choose Employees and then select Employee Center.
  • Double-click on the name of the employee to edit that profile.
  • Now, click on the Payroll Info tab.
  • At last, click on Direct Deposit button. Then, select to clear the box Use Direct Deposit for this employee.

In the event that one needs to make a one-time standard however non-direct store paycheck for a worker, who is only paid by means of direct store, all you need to do change a direct store paycheck into an ordinary paycheck.

How To Download Chase Credit Card Transactions Into Quickbooks

Download Chase Credit Card Transactions Into Quickbooks

QuickBooks online has presented an extraordinary element that will help you save a great deal of time and exertion. You would now be able to download and import credit card transactions into QuickBooks which will deal with your finances and spending plan.

In this blog, we will depict the means to import credit card transactions into QuickBooks Online without any problem. In addition, we have given point by point steps to download transactions in CSV format.

Things to Remember

You have to add a column for QuickBooks account number while downloading a record from your credit card company. On the off chance that you already have an account number, give the most minimal sub-account number.

  • There is a ‘pay’ column in the record which gets downloaded from the credit company containing extra details like merchant id. You can shape this column to match it with the seller name.
  • There is no impulse to add another value to your import document. There is a choice to give a default value when you import credit card transactions into QuickBooks work area.
  • To import credit card transactions into QuickBooks Online, you should enter credits manually.
  • In the event that you want to download transactions of over 90 days, you need to import your transaction in Excel format (CSV or QBO record).

Easy Steps to Import Credit Card Transactions into QuickBooks Online

Select Step Your Banking Center

  • First of all, enter your bank/credit card name in the search bar.
  • Now choose your bank/credit card company from the list.
  • If you couldn’t find your credit card company or you wish to download 90 days transaction then you have to do it using CSV format.

Step 2. Login to your business and credit card account

Login using your ID and password. It may take a few minutes to connect your bank with QuickBooks.

Step 3. Select your credit card account

  • Tick mark each account you want to connect with QuickBooks.
  • Next, you have to enter your bank account name.
  • Select the QuickBooks account where you have linked your bank account.
  • If you are unable to find it, then add account from the drop-down list.

Step 4. Choose the right date range

  • The transactions are usually downloaded in 90 days. In case you need transactions of more than 90 days then it is necessary to download it using CSV format.
  • If you need transactions for a shorter date range then click on the link “need a shorter date range”.

Step 5. Click on Connect

Click on the Connect button to download all the transactions into QuickBooks.

Note: There is no undo option once the transactions are downloaded. Therefore, make sure that you select the correct account because later you will have to delete all the transactions and downloaded it again.

Step 6. Transactions are downloaded

Once the transactions have been downloaded, you will get a message “We successfully downloaded your transactions. Hooray!”.

Step 7. Review Your Downloaded transactions

  • Check your credit card account and balance in the banking center.
  • If you wish to track another credit card account then click on add account and follow step 1.

How to Import Credit Card Transactions into QuickBooks Online with CSV file?

  • Firstly, choose Transaction and Banking.
  • Upload your file or transaction by clicking on Upload a file option.
  • Choose the QuickBooks account you wish to lick with the credit card account.
  • You can Add Account from the drop-down list if you do not have an account in QuickBooks.
  • Fill up the required fields to set up your account.
  • After entering all the details, map QuickBooks Online fields to your bank account fields.
  • Follow the below steps to map QuickBooks Online:
  • Select the date column, then choose the date format.
  • Now go to description and click on the file.
  • You will get positive and negative numbers in a single column.
  • Choose the column with a negative number.
  • Tick transaction you want to import into QuickBooks and select Next.
  • QuickBooks will confirm the transaction.
  • Click on Yes to confirm.
  • Finally, your transaction has been downloaded.

So this was the article, trust the above steps will assist you with easily downloading and import Chase banking transactions into QuickBooks. At last, we will recommend you to not to skirt a solitary steps while you follow any methodology. It may create a major issue to perform your work. All things considered, on the off chance that you have any questions regarding this topic, you know well, we are always with you to help you.

How to Record Journal Entries in Quickbooks Online

How-to-Record-Journal-Entries-in-Quickbooks-Online(1)

In the Accounting terms, a QuickBooks journal entry has two aspects, for example a debit entry and a credit entry. Generally speaking, the amount of the Debit Column is equal to the Credit segment. QuickBooks Online feeds the transactions in the register/account history as journal transactions. Utilize the Journal Entry in QuickBooks Online when you have to:

  • Send Money between income and business ledgers
  • Transfer cash from an asset, liability, or a value account to the income or the business ledger.
  • In the event that you need to enter debits and credits in General Journal or the Ledger.
Transaction-Date-in-the-Journal-Data-Field-

In this blog, we will concentrate on How to Create Journal Entry and other essential points related to it. In this way, we should start

What is a Journal Entry?

A general journal entry is an accounting transaction which presented straightforwardly on the company’s general ledger. Journal passages in QuickBooks allows you to adjust transactions post sections.

The interaction is extremely basic yet you can make a solitary entry for a customer at a time. On the off chance that you want to make changes for various customers, you need to post separate sections.

Important Rules to make journal entries

  • The client ought not make journal passages to inventory or payroll accounts
  • Also, the client needs to incorporate one account receivable or accounts payable sort account each entry
  • Moreover, it is important to utilize accounts receivable or accounts payable account on the second line of the journal entry
  • Also, entry to accounts payable sort or the accounts receivable will require a customer or vendor

Steps Involved in Creating a QuickBooks Journal Entry

Step 1: Move to the journal entry feature

The absolute first step during the time spent crafting a journal entry in QuickBooks is to navigate to the journal entry feature, Clicking the in addition to symbol for example (+) at the upper right of the record, will show a drop down menu names as “Create” in which the alternative for “Journal Entry” would be seen. When you will click on that alternative, it will redirect you to the window where you should fill in the necessary information.

make-recurring-Journal-entry-schedule-

Step 2: Enter date and journal number

The Journal entry form in QuickBooks online is very straightforward. When the form the is opened up on the screen, the client should alter the journal date, as the current date will be entered automatically in it by QuickBooks. In case you are recording any entry from any other date, make sure to correct the date before continuing further. After correcting the date, the client should fill in the journal number, or else QuickBooks will automatically enter the sequential number.

Transaction-Date-in-the-Journal-Data-Field-

Step 3: Enter the required information

Accounts: From accounts, the client meant the accounts in the chart of accounts.

Journal code: The client is then needed to fill in the Journal code related to the account. Entering New Journal Code is of much importance. The client should remember that he/she is needed to utilize the same Journal Code that is related to the transaction for the debit and credit accounts.

Debits or Credits: The client can search for the transactions in a new transaction report, and also it ought to be noticed that the first in line is Debits. Also, look at if the debit has changed after the transaction has been saved.

Description: The client is needed to enter a description to check the transaction details on the Reports.

Name: After that, select the customer, worker, or vendor.

Step 4: Choose to make recurring Journal entry schedule

make-recurring-Journal-entry-schedule
make-recurring-Journal-entry-schedule-2-
make-recurring-Journal-entry-schedule-

Twisting up

Creating Journal sections in QuickBooks online is certifiably not a gigantic task that can’t be performed by the QB users. By following the above-enumerated steps in the correct succession, the client will actually want to make journal passages in QuickBooks Online with no hassle.

How To Delete a Deposit in QuickBooks

How-can-you-delete-a-QuickBooks-Deposit

QuickBooks is an accounting software loaded with advanced features. Small and medium-sized business proprietors across the globe trust it to maintain their business easily and meet their financial goals. While it’s incredibly easy to use, there are a couple of features that are somewhat complicated. Deleting a deposit in QuickBooks is one such feature and we are going to explain the same here in this article. In the event that you make an off-base payment or an unnecessary payment, you can delete the deposit assets to stay with your’s books right.

How about we start by understanding payment categories in QuickBooks. QuickBooks payments are split into two divisions i.e, Deposited payments and undeposited funds.

The deposited payments hold the individual payments and deposits into the bank, and the subsequent one, the undeposited payment holds the small payment that you get all through the same day.

How to Delete a Deposit in QuickBooks Desktop?

Delete-a-deposit-in-QuickBooks-screenshot

These steps will assist you with understanding the right strategy for removing deposits in QuickBooks. In the event that you are looking for how would I delete the deposit in QuickBooks, at that point the below steps will help you:

  • At the very first, go to the lists and look for the chart of accounts icon.
  • Next, you need to double-click on the account and also double-click on the deposit.
  • If you need to delete a specific payment, then you have to select it from the list.
  • Next, click on the edit tab and click on the delete line.
  • At last, select the delete deposit in case there is a need to delete the complete deposit.

Steps to undo a Payment from deposit in QuickBooks

You can follow the below-mentioned steps to remove a payment from a deposit in QuickBooks:

  • Go to QuickBooks Homepage and open Record Deposit
  • Select Banking menu and the Make Deposits
  • Tap on Cancel if the window for Payments to Deposit opens
  • Choose Previous to browse through the transactions till you locate the payment or deposit that has to be deleted.
  • Tap on Edit menu and then select Delete Deposit to remove the deposit in QuickBooks.

Steps to Remove Duplicate Payments in QuickBooks

Duplicate payments show up in QuickBooks when by mistake you enter the payment twice if coincidentally you may have entered the payment more than once. Follow the below-referenced steps to easily delete duplicate payments in QuickBooks.

  • Click on the QuickBooks icon desktop and select the company file.
  • After your company file opens on your computer screen, go to the Banking menu and select Make a Deposit from options on the screen.
  • Choose the part that has to be deleted and then choose Edit.
  • Next, hit edit Delete Line from the drop-down menu.
  • Click Save for changes to get applied.
  • Now, move to the List menu and select Chart of Accounts.
Chart-of-accounts-option-Screenshot
  • Double-click on the undeposited funds and the bank account register will open.
  • Finally, click on the duplicate payment that has to be deleted and use the Edit tab to Delete Payment.

Steps to Delete or Undo Deposited Payment in QuickBooks

  • Open QuickBooks and tap on the Record Deposits icon available under the Banking tab on the dashboard.
  • Wait for the Payments to Deposit window to appear and then click Cancel under the Make Deposits View section.
  • I order to delete payments in QuickBooks, click on the particular deposit. If you are unable to find it, click Previous and find a specific entry.
  • Go to the Edit menu and press Delete Deposit.
  • A warning message will appear, press OK to confirm the action.

Follow the below-mentioned steps to remove a payment from un-deposited funds in QuickBooks.

Delete or Undo a Payment from Undeposited Funds

  • Go to QuickBooks and select Lists
  • Choose Chart of Accounts.
  • Select un-deposited funds from the drop-down list
  • Do a right-click on Amount to be deleted and click Delete Deposit in the available options.
  • Press OK for confirming the action

Delete or Undo a Payment in QuickBooks Online

If you are using QuickBooks Online, follow the below-mentioned steps to delete a payment.

Delete-or-Undo-a-Payment-in-QuickBooks-Online-Screenshot
  • Open QuickBooks Online, go to Customers menu and select the particular customer.
  • Wait for the payments to be displayed and select the payment to delete.
  • On the payments window, click More and then Delete.

You have got the idea that, how to delete and undo a deposit in QuickBooks. However, never forget that deposit, and direct deposit is not the same, so don’t be confounded while canceling direct deposit, and reversing deposit in QuickBooks. I hope this article will assist you with learning how to delete a deposit in QuickBooks Online and Desktop. After the above guidelines, in the event that you actually facing any kind of issue with the same topic or any other issue related to QuickBooks, please go ahead and contact Bigxperts Team.

How To Resolve Quickbooks Won’t Open Issue

QuickBooks-wont-open-issue

QuickBooks won’t Open is the one common issue that may be arisen accidentally and the clients get enraged on the grounds that the majority of the important task is on pending. As sooner as clients settle this issue, they can work with QuickBooks Help by problem uninhibitedly opening their organization documents or information. In the event that you are likewise the one who attempts to open QuickBooks Company record or information however unfortunately it forestalls to be opened, at that point don’t feel blue! You are at perfect spot as here; the total investigating strategy will be in your grasp. The necessary thing you ought to do is to peruse out this blog entry from top-to-toe cautiously and perform the tasks for what it’s worth on your own.

Anyway QuickBooks Desktop regularly runs down into inconvenience, after all it is a software. Regularly clients whine that they are dealing with issues like QuickBooks Desktop doesn’t start or will not open. Despite the fact that this issue can influence the business activity of an organization yet it tends to be effectively fix with the assistance of few specialized steps given below.

Reasons if “QuickBooks Unable To Open The Company Files”

There can be a lot of factors which causes company file not opening in QuickBooks issue. A portion of the common factors are given below:

  • Because of the company files get corrupted or damaged
  • It very well may be the file is now been opened on another framework utilizing multi-client network
  • May be you are utilizing the wrong technique to open the file
  • Report issue with the company file
  • QuickBooks software version may be obsolete
  • One principle reason can likewise be the company name is excessively long

Therefore, during getting to your QuickBooks help Company file, you should remember every one of these above things. On the off chance that the files get corrupted or damaged, simply look at it at a moment and attempt to fix this issue. As only then you will be appropriate to get to your information as often as possible without discovering any obstacle.

What Causes QuickBooks Desktop Doesn’t Start Error?

QuickBooks Desktop Doesn’t start due to various reasons and they are mentioned below.

  • Very long company name
  • Corrupted Hard disk
  • Improper installation of QuickBooks Desktop
  • Missing or damaged QBWUSER.INI file
  • Out of date operating system

Symptoms of QuickBooks Won’t Open error

  • The software freezes.
  • The QuickBooks company file doesn’t open.
  • Windows runs slowly
  • The computer hangs every now and then.
  • Computer responds very slowly to mouse and keyboard

Fix QuickBooks won’t Open with Easy Methods

Be that as it may, there are various courses through which you can fix QuickBooks won’t open obstacle. Every one of the successful cures are given here. You should simply to just go through the entire methodology till the end and dispose of this issue by several minutes.

Solution 1: Close QBW32.exe process

  • First thing to do is Right-Click on the “Windows taskbar” in the system and then select “Start Task Manager” option.
  • Now click on the “Process tab” and then click on “Image Name” header so as to arrange the processes alphabetically.
  • Then locate and select “EXE“.
  • Finally click on “End Process” to close the “exe process“
Close-QBW32.exe-process

Solution 2: Renaming the QBWUSER.ini. file

  • Try accessing the folder where ini file is there and if you cannot trace it then enable hidden folders and file.
  • Once the folder is found then click on the “QBWUSER.ini.file” and then select “Rename” option.
  • After this type “Insert.old” in the last file name.
  • Now change the name of “ecml.file“. After renaming the file if QuickBooks works then the issue is solved.
Rename-the-INI-file-in-QuickBooks

Solution 3: Suppress The QuickBooks Desktop Application

In case your company file is damaged or corrupted, then you have to be assured that the QuickBooks program itself is working. QuickBooks may be trying to open your previous company, so it’s important to isolate if the program or your company file is functioning.

  • Press and hold the “Ctrl” key on your keyboard and then press double-click on the “QuickBooks Desktop” icon
  • Important Note: Do not release the “Ctrl” key until you see the “No Company Open” window, unless QuickBooks freezes or gives you an error
  • Select a company file and choose “Open”
  • If the file hassle-freely opens, then you can frequently do your business work.But if still it is not opening, then try the next given solution.
Suppress-the-QuickBooks-Desktop-application-

Solution 4: Repair QuickBooks Desktop Installation if done incorrectly

  • On your keyboard click on “Ctrl +Alt + Del“
  • Now select the “Task Manager” option
  • After this click on the “Process tab“
  • Right-Click on any of the “QuickBooks processes“
  • After this click on “End Process“.
  • You will get a confirmation process and in that select “end all processes“
  • Try restarting QuickBooks again
  • Now click on “Repair QuickBooks“.
Close-all-QuickBooks-Processes-Screenshot

Solution 5: Create a new Windows Admin User

  • First click on the “Control Panel” and then navigate through it.
  • Double click on the “User Account” then “Manage User” and then to Click “Add“.
  • Once done enter the name as well as domain of the administrator and then click “Ok” button.
  • If using Windows 10 then select “Administrator“.
  • After this click on Finish which will direct to the ‘User Accounts’ dialogue box. Now Click “OK“.
Create-a-new-Windows-Admin-User

Solution 6: Restart Your Desktop

By restarting your Desktop, this will bring the system up from the scratch and swipes away the present state of the application. After restarting your Desktop completely, attempt to open your QuickBooks. It might be opened without any difficulty.

Reboot-or-restart-the-computer-Screenshot

Solution 7: Do a clean installation of QuickBooks

First of all, you have to uninstall the QuickBooks software and after then reinstall the QuickBooks software using clean install and then rename the installation folders.

clean-install-tool-in-quickbooks

Conclusion!

This brings us towards the finish of article and furthermore, we anticipate that subsequent to perusing this article and the solutions above, you could possibly dispose of QuickBooks won’t open after Windows update the issue no sweat.

How to Import IIF Files into QuickBooks Desktop

Import IIF File into QuickBooks

QuickBooks has improved essentially in the course of recent years and now offers abilities to more readily manage your records. With the capacity to import IIF files into QuickBooks, you can consolidate data stored at different storage locations and draw an unmistakable image of your records for reporting and examination. This article exhibits what IIF files are, what sort of data they contain, and how you can import them into your QuickBooks Desktop software.

What Is an IIF File?

An Intuit Interchange Format (IIF) is a format planned by Intuit as a method of bringing transactions or records straightforwardly into QuickBooks Desktop. It is a cross-platform text file that empowers you to organize your QuickBooks Desktop organization data better. An IIF file is selective to QuickBooks, however it tends to be opened and altered in Excel or Notepad. It contains money and record related data that can be orchestrated in an even format utilizing segments and columns.

What Data Can You Import from an IIF File into QuickBooks?

By importing an IIF file into QuickBooks Desktop, you can import data relating to your bank transactions, general diary sections, bookkeeper’s changes, and bunch transactions. You can likewise import various records like things, charts of accounts, client, and vendor records. Likewise, you can import different transactions, including beginning adjusts, checks, stores, solicitations, buy orders, cash discounts to clients, and so on.

What Are the Steps to Import an IIF File into QuickBooks Desktop?

QuickBooks doesn’t give specialized help to making or importing IIF files. In the event that you have made an IIF file utilizing outsider software, you should contact the client care of that particular software supplier for help. The system to import IIF files into QuickBooks Desktop likewise differs dependent on the rendition you are utilizing. For the most part, the means to import an IIF file into QuickBooks are as per the following:

  1. Sign into your company file as an admin.
  2. Click on the File menu and select Switch to Single-user Mode.
  3. Create a backup of your company file. You can use this backup to restore data if the import takes more than one attempt.
  4. Go to File and select Utilities, and then click on Import.
  5. Click on Import IIF Files.
  6. Browse through your computer to locate the IIF file you want to open. Once you find it, click on Open.
  7. Select OK to confirm the process.

It should import all the data from your IIF file into your company file. If the file fails to import, QuickBooks throws a File not imported error for you to review the file and reattempt the import.

Can Help You Simplify Importing IIF Files

The difficulties to effectively import an IIF file into QuickBooks Desktop start with bringing the IIF file to the framework where QuickBooks Desktop is installed. Moreover, Intuit doesn’t offer helped specialized help for import. As an Intuit Authorized Hosting Provider, has your software on a virtual desktop, empowering you to get to it distantly on the gadgets where IIF files are stored. It improves on import and permits you to utilize your software from any place you are. We likewise offer every minute of every day support by means of telephone, talk, and email for QuickBooks. Contact our QuickBooks hosting team for hosting plan asks today.

QuickBooks Import Export to CSV Files

QuickBooks Import Export to CSV Files

In this article, we are demonstrating how to import and export CSV files in QuickBooks Desktop. Assuming you are utilizing QuickBooks accounting software, you ought to know that there are various approaches to import and export data in QuickBooks software and that is the reason it is truly outstanding and most utilized accounting software on the planet. CSV files contain data in the even structure with (.csv) record extension. Go through the article to get the complete guide, in the event that you experience any difficulty in doing so then contact

Fields of CSV files are isolated by the comma and that makes them viable with some other spreadsheet program like Microsoft Excel or Google Spreadsheet. In any case, in the event that you need, you can likewise make and alter a CSV document with the text editors like Notepad.

Import CSV file

To import data in the CSV files then first you need to introduce the QuickBooks import Excel and CSV tool compartment. The downloaded tool compartment contains the following things.

  • Manual for importing from Excel and CSV: The manual will be PDF format with guidelines for import, featured discussions, and other accepted procedures that can help you.
  • CSV Examples Folder: In this folder, you’ll get 4 example CSV files, one for each sort of rundown.
  • XLS Example Folder: This folder contains an example Excel document that incorporates 4 worksheets inside, one for each kind of rundown.
  • Permitted fields: This is a manual that clarifies what fields are accessible for Excel and CSV import.

Follow the steps to install the QuickBooks Import Excel and CSV Toolkit

To begin with, download QuickBooks Import Excel and CSV Toolkit document from the official Intuit QuickBooks website. Save it on your PC.

  • It is prescribed to save the document on your PC’s desktop page.
  • From that point onward, you need to remove the record. For this, double tap on the QuickBooks_Import_Excel_and_CSV_toolkit.exe on your Windows desktop. By doing this, the WinZip File extractor window will open.
  • In the following window, click on the Browse catch and then select a location on your PC where you need to introduce the program and then select OK.
  • From that point onward, you need to remove the files, for this click on the Unzip button and when the files are separated completely click on the Close catch to close the WinZip Self-Extractor window.
  • Finally, you need to open the QuickBooks Import Excel and CSV Toolkit folder. You can discover it at the location you chose in sync 4.

If you don’t want to use Microsoft Excel on your computer but instead you can use CSV files for exporting a list. You can also use this if you want to view and edit in different formats.

Customer and Vendors

In the first place, go to the top menu bar and then open the Customer/Vendor Center.

  • From that point forward, click on the Excel drop-down menu and then select any of the following alternatives.
  • Select Export Customer/Vendor list choice on the off chance that you need to export data like name, contact information, and equilibriums.
  • Select Export Transactions alternative on the off chance that you need to export transactions. From here, you can either transfer according to name or by the exchange type.
  • Presently in the export window, you need to choose the Create a comma-isolated qualities (.csv) record choice.
  • Then, click on the Export button.
  • From that point forward, you need to choose a location on your PC to export files and then give a suitable name to the record.
  • Finally, you can open the record and alter it according to your prerequisites.

Items

  • From the top menu bar, click on the List menu and then select the Item List option.
  • Then, click on the Excel drop-down menu and select the Export all items option.
  • Now in the export window, you need to select the Create a comma-separated values (.csv) file option.
  • Next, click on the Export button.
  • After that, you need to select a location on your computer to export files and then give an appropriate name to the file.
  • At last, you can open the file and edit it as per your requirements.

Reports

  • First of all, open the report that you wish to export.
  • At the top of the report, click on the Export drop-down menu.
  • From the drop-down menu, select the Create New Worksheet option.
  • Now a window named Send Report to Excel will open, you need to select the Create a comma-separated values (.csv) file option.
  • Next, click on the Export button.
  • After that, you need to select a location on your computer to export files and then give an appropriate name to the file.
  • At last, you can open the file and edit it as per your requirements.

When using the App for importing excel files into QuickBooks Online and importing CSV files into QuickBooks Online, sometimes it is necessary to change your email address. The email address that is currently used can be seen in the upper right corner of the screen. To change that email address click on the gear icon and then choose your account.

Ctrlr